Ironhead Pinion Gear Remove And Install
Article by Mark Trotta
If you're working on a 1976 or earlier Sportster, the pinion gear in the cam case is press-fit onto the pinion shaft. Although a specialty tool is recommended, there are other methods to remove and install it.
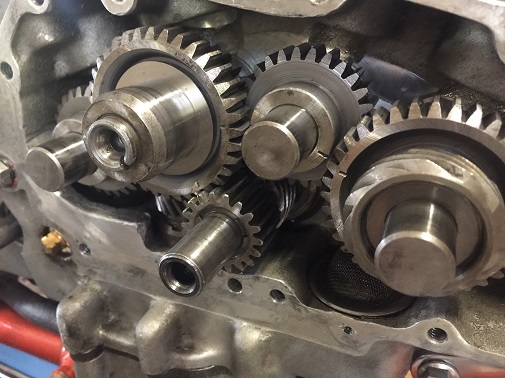
If your 1976 or earlier Sportster pinion gear slips on and off the shaft without any effort, you have a worn out pinion gear. It's best to replace it, otherwise you'll have excessive noise.
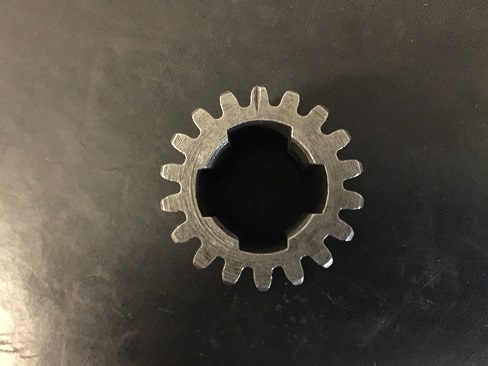
The pinion gear itself dates back to the 1930's, and it's a carryover from the Harley 45 flathead motor (along with a dozen or so other parts). The factory part number is 24011-37 and it fits 1957 through 1976 Sportsters as well as 1952-1956 Harley K models. Although H-D no longer produces this gear, the Harley part number is still used as a reference.
************************
Early vs Late Ironhead Pinion Gears
On 1977 and later Ironhead Sportsters, the pinion gear is a slip-fit and no special procedure is needed.
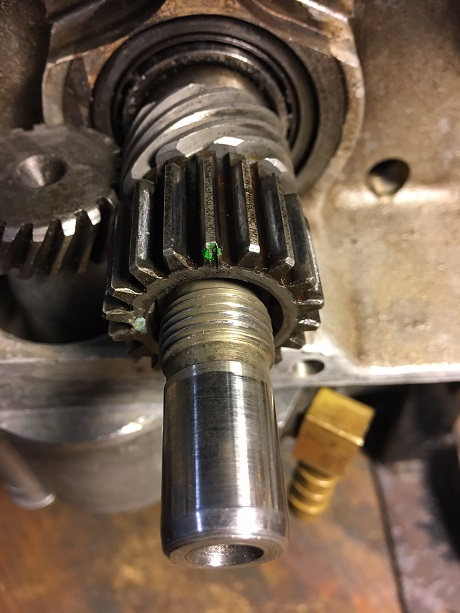
A lock washer and locknut secures them.
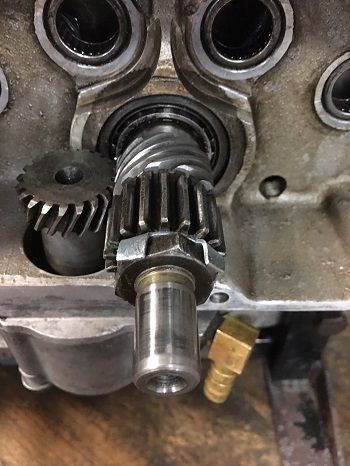
These later ones are color marked from the factory to match the particular pinion shaft.
************************
Remove Pinion Gear
I use a two-jaw puller to remove the pinion gear from the shaft. The only potential trouble with this method is, if you're not careful, the threaded stud of the puller can damage the internal threads of the pinion shaft.
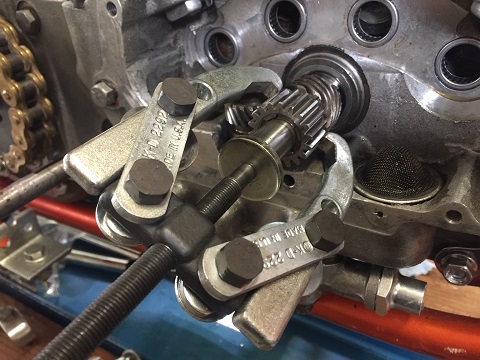
To avoid damaging the internal thread when using a two-jaw-puller, I'll place a thick washer in front of the threaded stud while removing the gear.
************************
Pinion Gear Installation
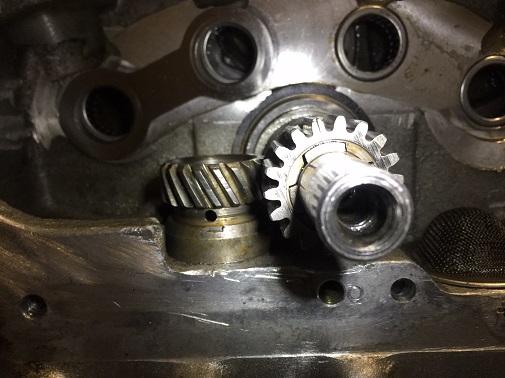
On Ironhead Sportster engines, the part of the oil pump that sticks up into the gear case is called the breather valve. On top of the breather valve is a horizontal gear.
Before the pinion gear gets installed, and before the spiral oil pump gear slips on, the breather valve gear needs to be positioned correctly.
************************
Breather Gear Timing
To time the breather valve correctly, first the flywheel has to be in the correct position. Remove the timing hole plug on the left crankcase, and turn the motor over until the correct timing mark is in view. This is a lot easier to do on a kick-start bike.
TIP: Taking the spark plugs out will make turning the engine over easier.
************************
Line Up Flywheel Timing Mark
There are several marks on the flywheel (one dot, two dots, vertical line) so be sure you use the one with the vertical line.
Different year Sportsters have different timing marks. It's best to check the factory service manual.
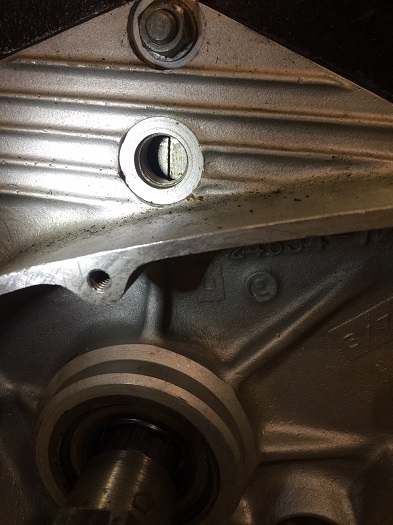
(Picture above) This is not Top Dead Center. This is a timing reference mark.
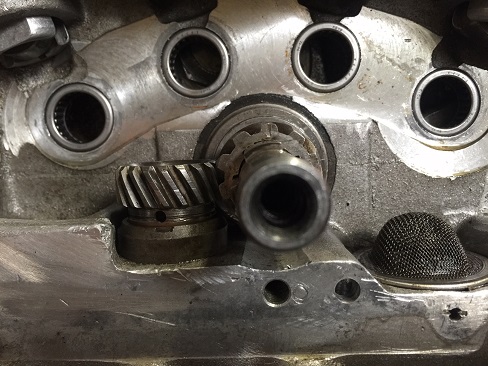
(Picture below) When timed properly, the small oil hole on the breather valve will face out with the vertical hash mark showing through the timing hole.
************************
Install Spiral Gear
The oil pump drive gear (Harley #26318-37) is commonly referred to as the spiral gear. You will notice that one side of it has a hash mark - this faces out toward the pinion gear. The spiral oil pump gear meshes with it as it goes on the pinion shaft.
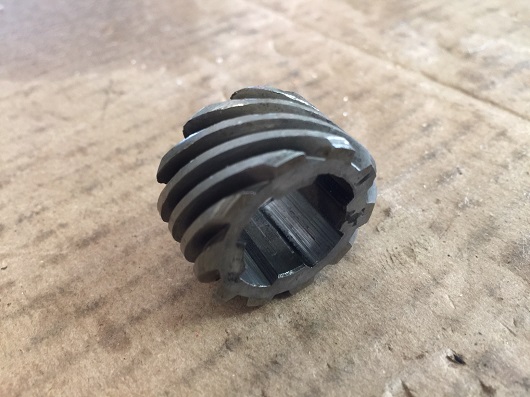
The pinion shaft has four cogs, and one of them is wider than the other three. This means the spiral gear and pinion gear only fit one way, but you can still incorrectly time the breather valve.
It may take several attempts to line up the gears.
Once the breather is correctly timed, the pinion gear can be installed.
CAUTION: If the breather valve is not correctly timed, the gear case does not get properly lubricated. This can have disastrous results at higher RPMs.
************************
Pinion Gear Puller Tool
The pinion gear puller tool allows easy removal and installation of the pinion gear. The OEM Harley part number for the pinion gear puller is #96830-51. They are available from several aftermarket companies, including Jims Tool.
The tool is usually sold as a kit. Included is a special 5/16-24 left-hand thread rod, which threads inside the pinion shaft and allows for easy gear removal. With the proper adapters, the tool can be used for both Harley Big Twins and Sportsters.
The Jims Tool version is over $300, so I bought a cheaper imported version because it was a third of the price.
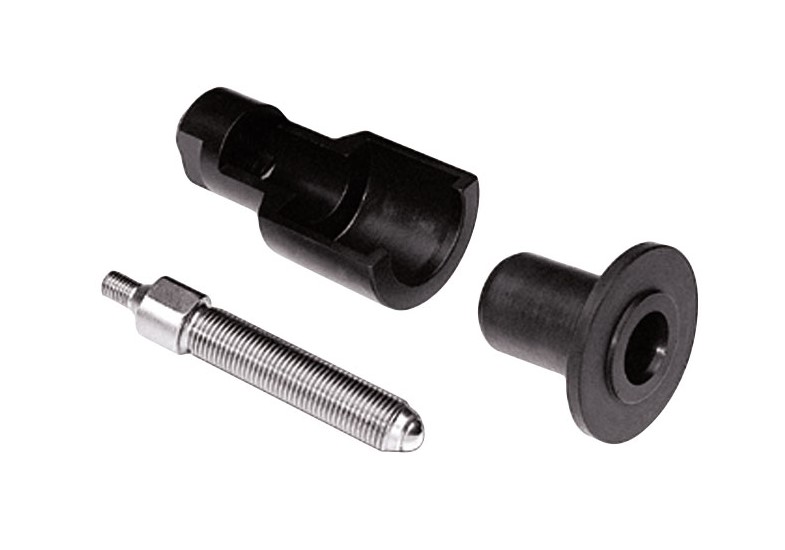
With the imported tool, the install part of the tool worked fine, but the removal part of the tool was too thick to remove a Sportster pinion gear. So, I used a two-jaw puller to remove the pinion gear from the shaft.
NOTE: If you need to remove a Big-Twin pinion gear, the cheaper tool will probably work for both removal and installation.
Install Pinion Gear With Tool
The installed distance between the face of the gear case (where the timing cover gasket lies) and the face of the pinion gear needs to be 5/16 of an inch. Using the specialty tool pulls the pinion gear smoothly into the spiral gear at the exact needed distance. The tool is designed to bottom out when the pinion gear is exactly at proper 5/16" distance.
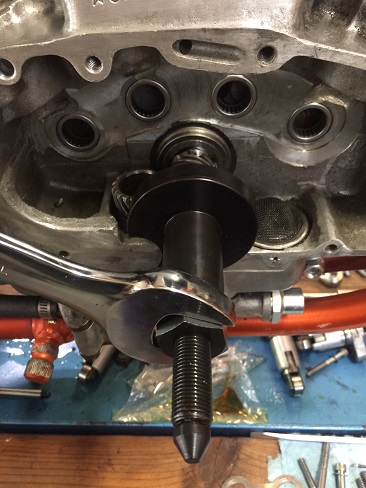
An alternate method for installing the pinion gear, although it's harder to get the measurement right, is tap it on with a hammer and a socket. If you decide use this method, be aware that you can knock your flywheel out the balance if you swing too hard. To avoid this, take light, deliberate, short strokes. And if you tap it on too far, you'll be pulling the pinion gear out and doing it again!
Caution: Left Hand Thread
The internal part of an Ironhead Sportster pinion shaft is left-hand thread. On one occasion, I had to re-tap the pinion shaft thread on an early Sportster. Since this thread is used for no other purpose than installing the tool, I can only presume that somebody carelessly used a puller to pull the pinion gear off.
************************
Gear Case Reassembly
There is no need to reference the flywheel timing mark when installing the cams. Once the breather is timed correctly, the cams get referenced off the notch on the pinion gear.
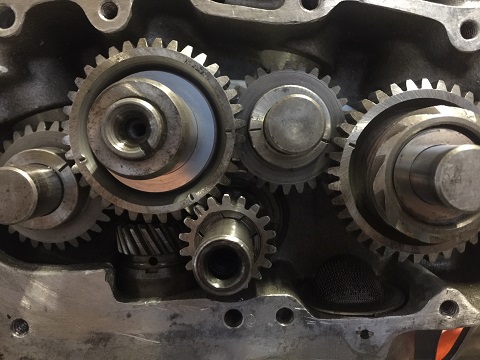
Read: Install Sportster Cams
************************
Related Articles: