Sportster Cam Bushings (Remove and Install)
Article by Mark Trotta
If you've ever listened to an Ironhead Sportster idling, you've likely heard a lot of clacking noise. It may not be needing a valve adjustment, very likely it's the cams riding in worn bushings.
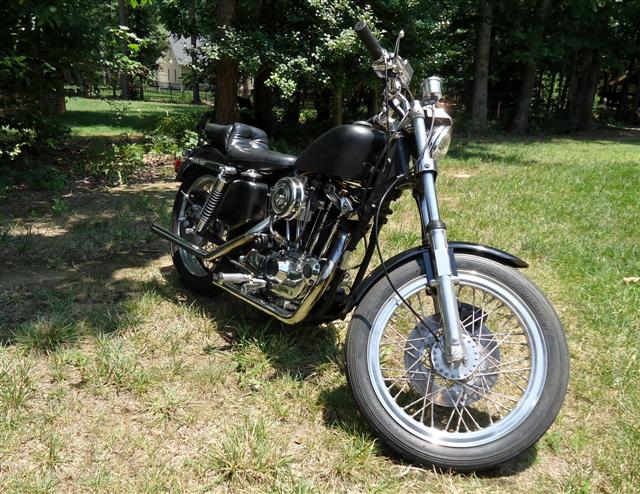
The noise doesn't really effect the way the bike runs and will not cause engine damage. But if you have the engine apart and would like less cam noise, replacing and reaming the cam bushings is in order.
An Ironhead cam cover, also called the gear cover, is made of aluminium, and has six bronze bushings pressed into it. It is a load-bearing cover, as it supports four cams, the pinion shaft, and an idler gear.
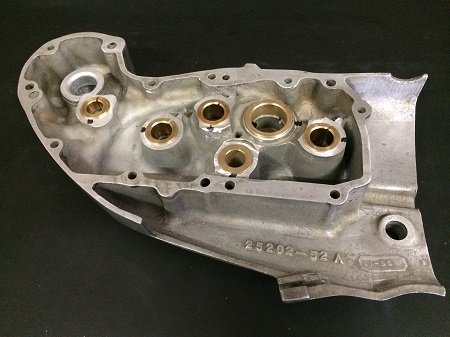
The most common reason to replace Sportster cam bushings is because they're worn. Another reason is, if you had old chrome chemically removed from a cam cover.
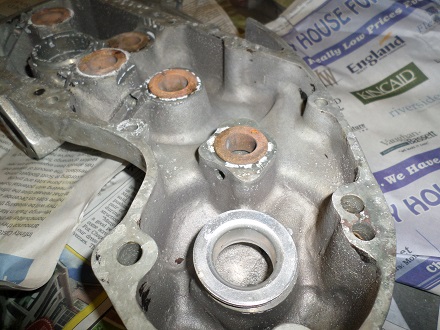
The way the plating shop explained it to me was, the bushings get contaminated from the acid that is used to strip the old chrome.
Ironhead Cam Bushings
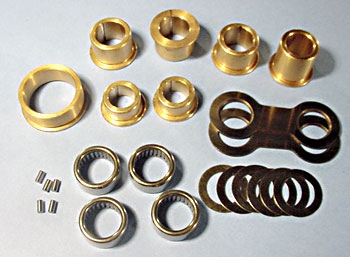
Replacement cam bushing kits are readily available for your Ironhead Sportster. Aftermarket kits usually include cam plates, bushing pins, and four cam bearings as well.
There are two kits available, one for 1957-1976 XL models, and one for 1977-1985 XL models.
Shop: 1957-1976 Sportster Cam Bushing Kit
Shop: 1977-1985 Sportster Cam Bushing Kit
New cam bushings are made to size, but the I.D. usually distorts a little during the press-in procedure. This is corrected during the line-reaming process.
Remove Old Cam Bushings
Cam bushing removal isn't that hard, nor is the cam bushing installation. The difficult part is properly reaming the new bushings once they're installed. Again, the key word is "properly". By this, I mean following the procedures laid out in the Harley-Davidson service manual.
Line-Reaming
Sportster engine cases and their cam covers were matched on the assembly line, before the engine was assembled. The cam bushings in the cover were not only reamed to fit the camshaft, they were also line-reamed with the right-side engine case. Once optimum clearances are achieved, the cams will spin as freely and quietly as possible.
Do I Need To Ream New Cam Bushings?
There are plenty of Sportster owners in the past who have replaced their cam covers, perhaps for a chrome one, without reaming to fit. Or perhaps changed a cam bushing or two and not reamed the new ones to size. Yes, your bike will still run, but there's potential danger.
Potential Trouble
If one or more of your cams is riding too loose, they're just noisy, but a cam running too tight spells trouble. If there is not enough minimum cam-to-bushing clearance, the running friction builds up heat, causing tooth surface failure or worse.
A cam will let you know it's too tight by making a whining noise when the motor is running.
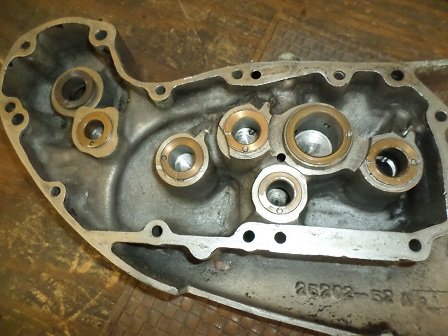
The six bronze bushings in your Sportster cam cover are known as blind bushings, because you can't get to them from the back side. This makes getting them out a little harder.
Before removing, note which way the oil grooves face on the four bushings that have the oil slot. They need to go back in the same way to maintain proper engine oiling.
Idler Gear Bushings
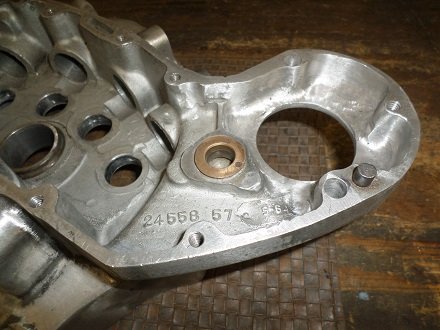
Just below the generator mounting hole, there are two idler gear bushings. One of them is in the cam cover and the other is in the right-side engine case. If you're replacing the cam cover bushings, replace the one in the engine case, too. The idler gear bushings need to be finish-reamed to size, but do not need to be line-reamed.
Cam Bushing Removal Tool
There is a Harley-specific tool called a "crankcase cam-gear shaft bushing remover". This tool carries part number #96760-36, and has only one function--to remove cam bushings. Of course, the factory-designed tool would be nice to have, but not really needed, as there are other ways to remove Sportster cam bushings.
The method I chose was to employ tools that I already had, which was an electric grinder and a 24" slide hammer. It also helps to have a solid workbench vise.
Removing Bushings From Cam Cover
Here is one method to remove cam bushings. First, carefully grind off the bushing collar with an electric grinder. Work slowly and stop frequently to check your progress. You don't want to take off any unnecessary metal from the cam cover.
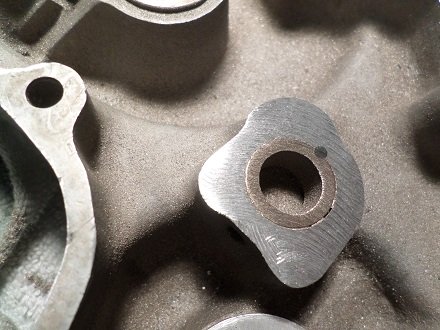
Once the bushing collar is ground off flush, the rest of the bushing should come out easily with a few raps of a slide hammer. Before you remove if, mark where the pins were. This can be done with either a scribe or a black felt-tip marker.
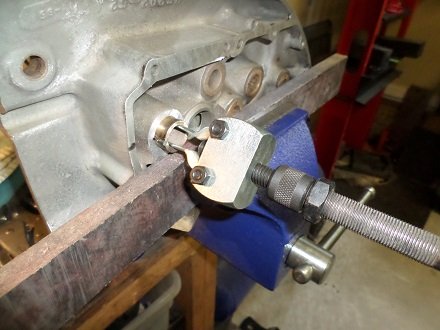
After all the old bushings are out (including the one in the engine case) spray down everything with brake parts cleaner, wipe the cam cover clean, and dry with compressed air.
Install Cam Bushings
A hydraulic press is best for pressing in new bushings. If you don't have access to one, here's another way. Put the bushings in a freezer overnight. The next day, heat the bushing cavities slightly with a propane torch. By freezing the bushings and heating up the cam cover, they should go in pretty easily. A large C-clamp may come in handy.
Remember to line up the oil grooves on the four bushings that have the oil slot.
Cam Bushing Pins
From the factory, 1/8" x 1/4" pins were installed in each bushing collar to prevent it from spinning in it's cavity. I have read on forums that some Ironhead owners are gluing their new cam bushings in, rather than pinning them in. Presumably this is done because they do not have the proper tools to pin them properly.
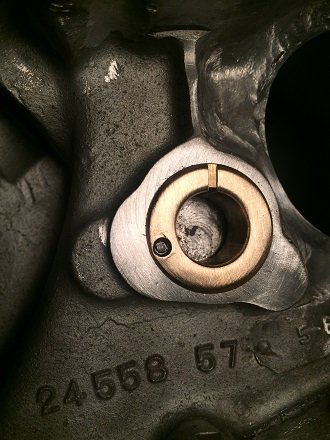
Bushing Pin Replacement
New holes are needed for the new bushing pins, as they will not fit tightly back into the old holes. This is done to insure the bushings don't spin in the cavities.
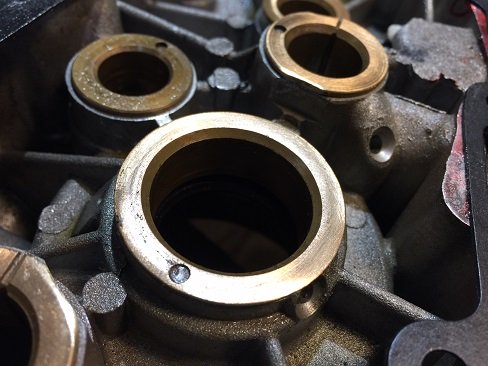
With a #31 drill bit, drill a hole through the cam bushing flange and into the aluminum.
The pin is a press fit: the pin has a width of .125" and a #31 drill bit has a width of .120".
The hole for the pin should be 9/32" deep.
Jim's Tool makes an excellent tool to help with this. This tool also doubles as a bushing installer when using a shop press.
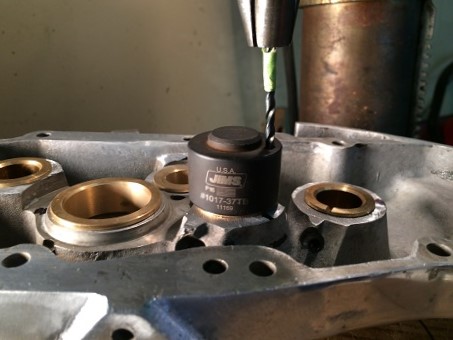
Shop: Sportster Cam Bushing Tool
Notice the green tape on the drill bit. That's my "stop collar" so I won't drill deeper than 9/32". Most drill presses have a locking hub for this, but I find that a piece of tape is quicker.
The factory manual recommends drilling the new hole at least 1/8" from the old one.
Install the new pin with a hammer and punch. Make sure it's below the surface level of the bushing face. When done, slightly distort the top of the pin. This process is called peening.
Line-Reaming Bushings
Generally, line-reaming is done when rebuilding an entire engine. Remember that the cam bushing is not just reamed to fit the camshaft, they are are also line-reamed with the right-side engine case. This aligns everything together--the engine case (cam bearings) and the bushings in the cam cover.
Proper cam bushing reaming requires splitting the engine cases. If you happen to be doing a bottom end rebuild, you'll have the cases apart anyway. Alternatively, you can use an "extra" right-side engine case. Old school motorcycle shops used to keep a donor engine case specifically to ream new cam bushings after they were pressed in.
The cam reaming process is not that difficult, but the reamers are expensive if you don't have them. Three different sizes are needed, plus you'll need pilot guides. Unless you're planning on rebuilding another Sportster or two, these are costly one-time use tools.
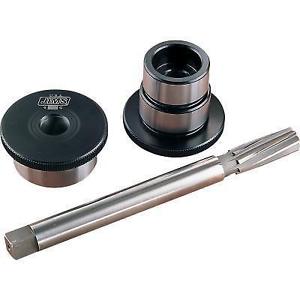
Read: Ironhead Special Tools
Ream To Size
Insert the reamer pilot guide into the right-side engine case.
Using a T-handle or something similar, turn the reamer clockwise at a steady pace.
Once you feel it is all the way through the bushing, stop.
Continuing the clockwise motion, slowly pull the reamer out.
Do not turn the reamer counter-clockwise, as it dulls the reamer blades.
After the new cam bushings are installed, pinned, and reamed, run a hand-held drill bit or something similar into the cam bushings that have oil drain holes. You want to make sure the holes are clear to properly drain the oil.
Cam Bushing Clearance
Minimum cam-to-bushing clearance is critical. This can be checked by measuring the I.D. of the cam/gear bushing and the O.D. of the cam/gear, then subtracting the two. The factory service manual calls for .0005" to .002" clearance for the cam gears, and .0005" to .001" for the idler gear.
Cam Gear End Play
From the factory, Ironhead Sportsters were fitted with shims between each cam and it's bushing. Clearance should be between .001" to .006" and can be adjusted by adding or removing shims.
To check cam gear play, mount your cam cover with a new gasket, and install and tighten 4 or 5 cam cover bolts. Through the lifter bores, check end play with a feeler gauge.
Although minimum end play is critical, maximum end play is not. Some techs will set the rear intake cam to no more than .004" and the other three cams no more than .005".
Read: Install Sportster Cams
***********************