How To Install Ironhead Cams
Article by Mark Trotta
The Sportster drivetrain is a direct descendant of the Harley flathead, which was designed back in the 1920's. Although it is a bit complex, it works very well when set up properly.
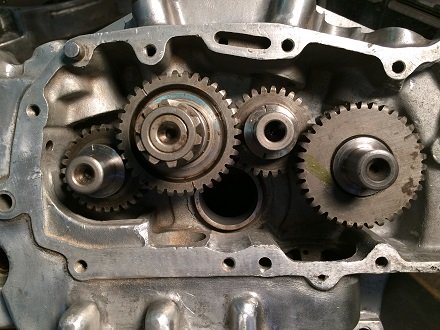
All Sportsters have four different cams, one for each valve (two intakes, two exhaust). The factory service manual numbers them from back to front; rear exhaust (1), rear intake (2), front intake (3), and front exhaust (4).
From the factory, Ironhead Sportster cams are stamped 1, 2, 3, or 4, which are followed by a letter or letters (P, PB, XL, Q, etc.)
Caution: Do not mix different letter cams
Early vs Late Ironhead Cams
Early and Late Ironhead cam sets are slightly different from each other. Early Sportsters (1957-1970) have an additional gear on the #2 cam (rear intake) which run the circuit breaker. When ignition points were moved into the right case in 1971, this was no longer needed and the #2 cam was redesigned.
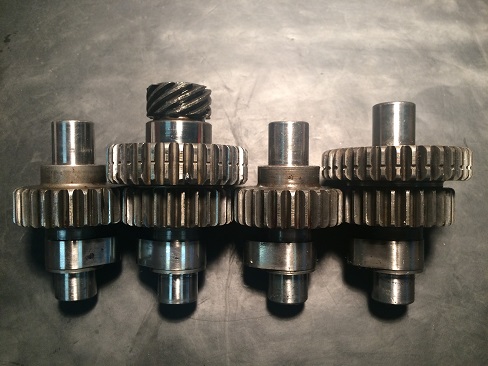
1971 through 1985 Sportster engines have a tachometer drive gear on the #3 (front intake) cam. Early models do not have this, as 1957 through 1970 Sportster tachometers run off the transmission.
Ironhead Cam Inspection
If you're putting in a set of used cams, carefully check them before installing.
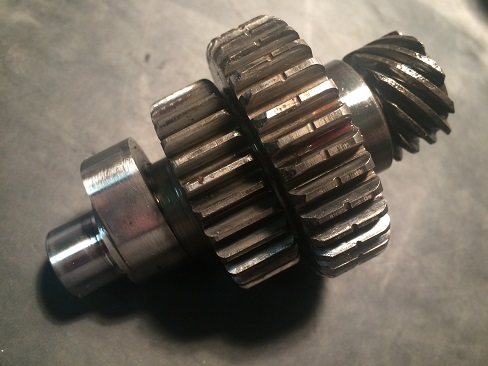
- Check for wear, rust, pitting or corrosion on the lobes.
- Check that cam gear teeth are not chipped or missing.
- Measure the cam journals that they are not worn undersize.
Ironhead Cam Installation
Before the cams go in, install the two cam plates. The beveled side of the plate faces outward.
Lubricate the cam shafts and position in gear case. The side with the number on it faces outward.
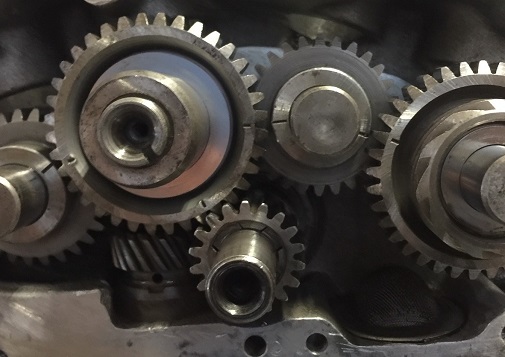
Remember that the numbers go back to front; rear exhaust (1), rear intake (2), front intake (3), and front exhaust (4). The notch marks on the cams rarely line up perfectly, so use your best judgment.
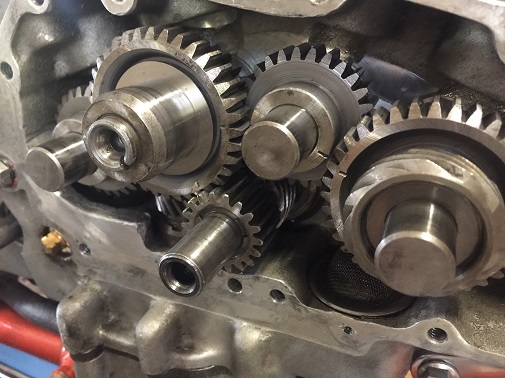
The idler gear gets installed with a fiber washer toward cover side.
Check For Cam Binding
When satisfied with the cam alignment, temporarily install the cam cover with four bolts and include the gasket. The gasket makes up part of the end-play you'll be checking. Once the cam cover is on, tighten the four bolts.
Ironhead Cam Cover
During engine assembly, you will be installing and removing the cam cover several times. The cover should go on with little or no effort. If it doesn't, stop and find out why.
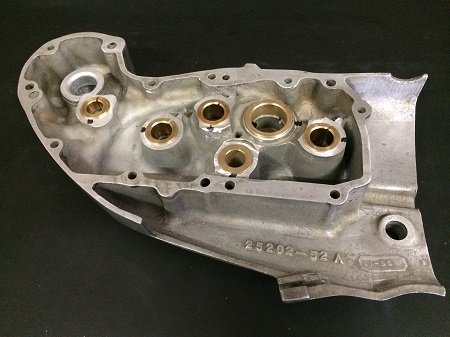
A cam cover may have been previously replaced but not aligned correctly.
Caution: Never use anything heavier than a soft mallet to tap on a cam cover.
After the cams are installed and there's no binding, install cam cover and gasket and tighten all bolts.
***********************
How To Check For Cam Binding Before Installing In Motor
Lay the cam cover flat so that the inside faces up. Put some motor oil on the cam teeth and stand them upright in the cam cover. Turn them slowly and feel for binding. If there is, stop and find out why.
If the motor is out of the frame, lay the engine on it's side and install the four cams (without the pinion gear). Turn them slowly and feel for binding. If there is any, stop and find out why.
Stand the motor upright and slowly turn the motor over by hand. If you have the cylinders off like I did, this can be done by pushing and pulling the piston rods with both hands. Of course there is now more resistance, but feel for any binding, no matter how slight. If there is, stop and find out why.
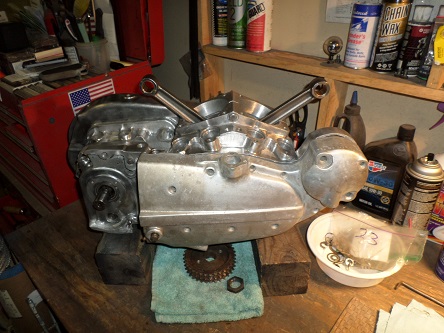
If all is well, remove the cam cover and install the idler gear and generator. Again, check for binding or excessive play. Doing this in steps isolates what is causing any potential binding.
***********************
Minimum Cam End Play
After the cams are installed and no binding is felt, cam end clearance can now be checked.
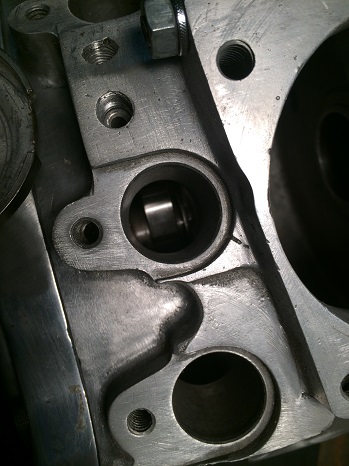
With the cam cover and gasket on and tightened, but with tappet guides not yet installed, slide a feeler gauge down into the open tappet-block hole. Minimum acceptable cam end play is .005".
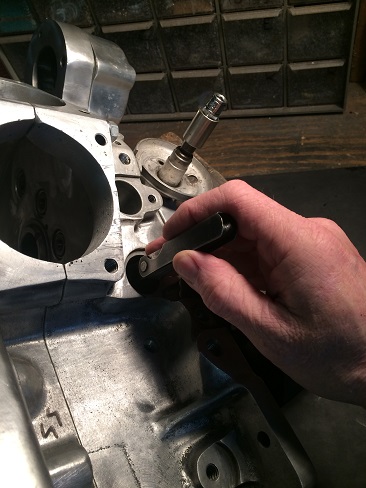
A cam that fits too tight will whine, and eventually cause localized gear tooth heating that leads to tooth failure. Better a little too loose than a little too tight. A little valvetrain rattling won't hurt anything.
***********************
Cam Gear Shims
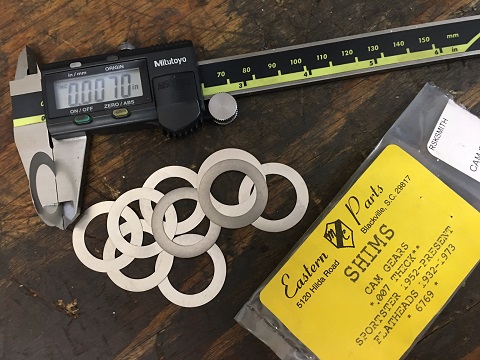
Most Ironheads left the factory with a thin steel shim behind each cam, but some cams may have had two, while others required none at all. The shims are commonly installed between the cam gear plate and the cam, but are also found on the outside (cover side) of the cam.
Check cam end play without shims first, write down the measurements, then add shims as needed. Cam shims are offered in .005" and .007" sizes.
Read: Best Digital Caliper For Engine Building
***********************
Maximum Cam End Play
Maximum cam end play has traditionally been between .005" to .010". However, in 1985, Harley-Davidson put out a Service Bulletin discontinuing the use of Sportster camshaft shims.
Service Bulletin M-680
Factory testing revealed that too much cam end play neither increased engine noise nor affected engine performance. So, maximum cam-to-bushing clearance is not critical.
If you had shims when you dismantled the motor, you can re-use them if you want. A good rule of thumb is, if they had them when the motor was taken apart, I'd likely re-use them only AFTER measuring end play.
Cam Bushing Clearance
Minimum cam-to-bushing clearance is very critical. Cam bushing clearance is checked by measuring the I.D. of the cam bushing in the cover, then measuring the O.D. of the cam gear, then subtract the two figures. The factory service manual calls for .0005" to .002" clearance for the cam gears, and .0005" to .001" clearance for the idler gear.
***********************
Final Cam Cover Installation
If the motor is out of the frame, before you button up the cam chest for the final time, lay the engine on it's side and pour about a 1/4 pint of engine oil all over the gear assembly.
If you haven't done so already, install a new gasket on the cam cover with a non-hardening sealant.
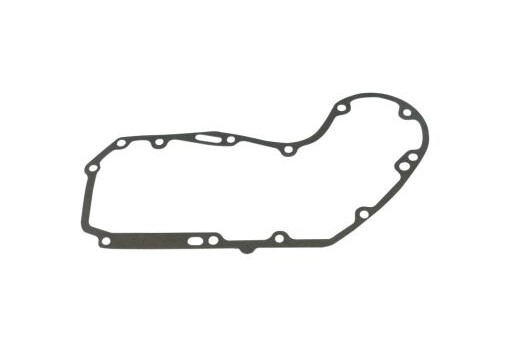
If you need to replace your cam cover gasket, you can buy one here.
Tighten all cover bolts evenly. Remember that these are aluminum parts, so don't over-tighten or you may crack something.
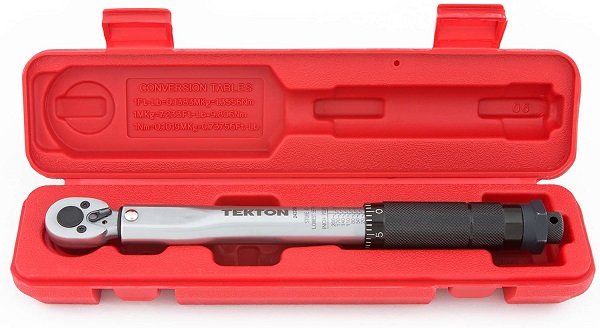
Having an inch-pound torque wrench will prevent over-tightening.
After the cam cover is on and bolts are tightened, turn the flywheel and check for any binding.
NOTE: It's harder to feel binding on a completely assembled engine, because of the friction from the piston rings/cylinders and the primary/transmission. Use your best judgment as to what is acceptable.
***********************
Solid Lifter Cams
All years and models of Ironheads have solid lifters (also called tappets). Unlike hydraulic lifters, they have no plunger mechanism. As you can see from the picture, they're basically steel cylinders with wheels on the bottom.
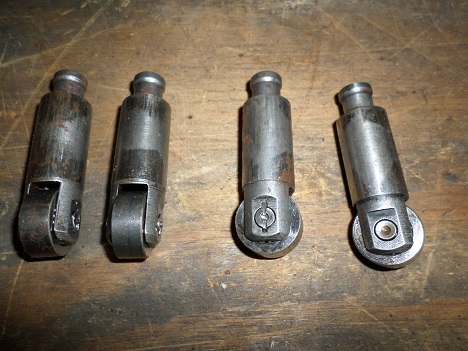
Solid lifters were popular back in the day, because they allowed higher RPM's with no lifter collapse. Although effective, they require frequent adjustment and are seldom seen on street bikes today.
***********************
Notes and Misc
Cams for first-year (1957) Sportsters were a carryover from the Harley K-model and were one-year use only.
Early high-performance Sportster XR race cams had smaller shafts, and do not fit in standard production XL engines.
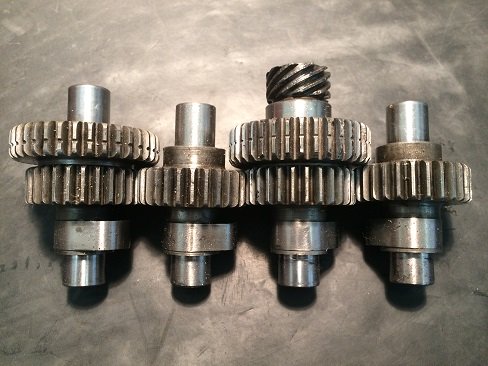
Many Ironhead Sportsters produced from 1958 through 1979 were factory fitted with "P" cams, which are marked on each cam (1P, 2P, 3P, 4P). A "PB" cam option came about 1966.
1980-1985 cams are marked "Q" and are slightly milder than "P" cams. They will retrofit 1971-1979 engines.
Cams from 1971-1979 Sportsters may be used on 1980-1985 motors, provided you don't mix the set. This should improve performance somewhat.
Ironhead cams can be slightly advanced for slightly better performance. This will give more overlap, but should be done only by experienced engine builders.
If you change your cams or swap out your cam cover with a different one, clearances should be checked.
***********************
Related Articles: