How To Adjust Ironhead Valves
Text and Pictures by Mark Trotta
If your old Sportster is hard to start or running poorly, the valves may not be fully opening or fully closing. This article offers step by step instruction on how to adjust Ironhead valves.
What's Involved
To start with, you're locating TDC (Top Dead Center) for each cylinder, then setting the tappet to adjust on it's lowest point. Next is loosening the locknut on the adjusting screw and adjusting until the pushrod has no vertical play but can still be turned with a slight drag.
What Is Valve Clearance?
All Sportsters have four cams, located in the right-side engine case. Above each cam is a lifter (also called tappets) which sit below each of the four push rods. Valve clearance is the space between the top of the lifter and the bottom of the push rod.
Why Valve Clearance Is Important
If a valve doesn't have enough clearance, it doesn't fully close. This allows some compression to escape through one or both valves. Aside from losing power, the affected valve(s) may become overheated.
If a valve has too much clearance, it doesn't fully open. This robs the engine of power.
Through normal use and wear, engines with solid lifters require periodic adjustment.
**********************
Getting Started
Mechanically, Iron Sportsters remained much the same through their long 26-year production run. All years and models have solid lifters. Adjusting valves on a late 50's or early 60's bike is the same as on 70's and 80's bikes.
Do I Need A Work Stand?
Having a motorcycle lift stand is a great time (and back) saver, but most motorcycle maintenance can still be done "old school" (you crouched on the floor).
Valve clearance is measured when the engine is cold, and when each lifter is at it's lowest point (when that particular valve is closed).
Adjusting valves requires slowly turning the flywheels, which turns the cams, which moves the lifters into the up or down position. The engine will need to be rotated approximately 6-12 times during the valve adjustment procedure.
There are several ways to do this:
Method One - If your bike has a kick-start, you can turn the motor over with the kick pedal.
TIP: Rotating the engine is much easier with the spark plugs removed.
Method Two - For non-kick start bikes, you can raise the rear wheel off the ground an inch or two, then with the bike in gear, turn the rear tire by hand. This will allow you to slowly move the flywheels/cams/lifters.
Method Three - On the 1981 Sportster in the pictures, the motor is a fresh rebuild, and I'm purposely adjusting the valves before re-installing the clutch cover. This allowed easy access to the front motor sprocket nut.
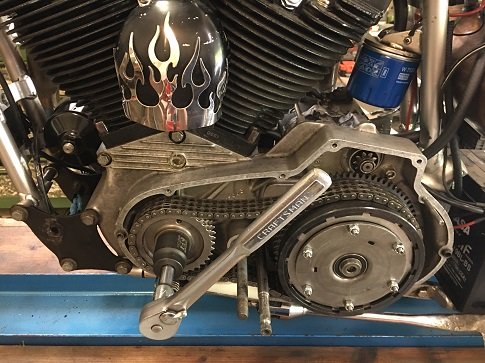
Turning the sprocket nut rotates the flywheels/cams.
**********************
Push Rod Cover Removal
Before I had the proper tool, I was using a screwdriver to hold down the push rod tube with one hand, then trying to remove the spring cover with the other hand while under tension. They should be under considerable tension--if they aren't, the inner tube springs may be worn, which would allow oil leakage.
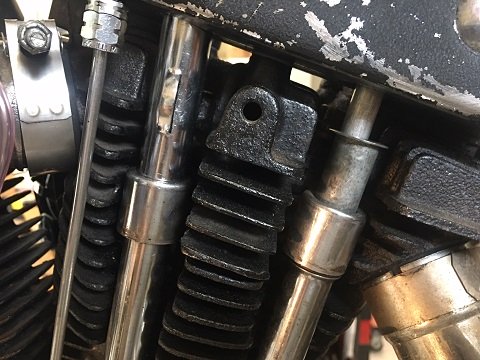
If you're not super careful, the screwdriver will slip and scratch the chrome covers.
Push Rod Cover Tool
The Motion-Pro push rod tool removes and installs push rod tube clips with no hassle.
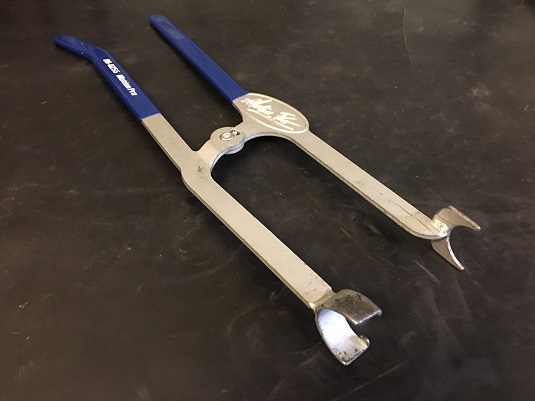
The flat portion of tool fits under the cylinder head, and the cupped end fits over the bell in the tube.
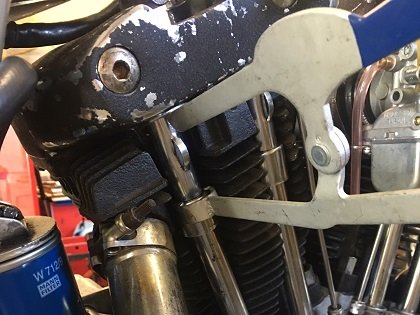
When you squeeze the tool, the spring compresses, and allows easy access to the spring cap retainer.
And re-installing them is just as easy.
Push Rod Cover Hangers
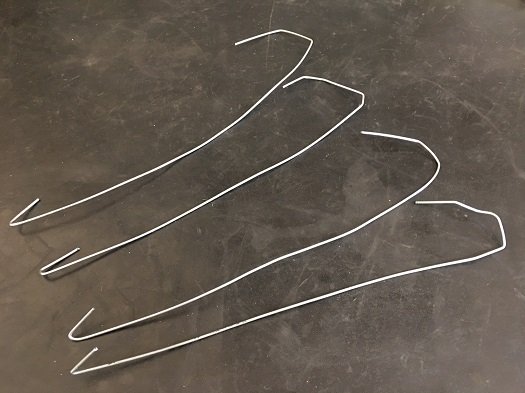
You'll need a way to hold up the lower tubes up and out of the way while checking and adjusting valve clearance.
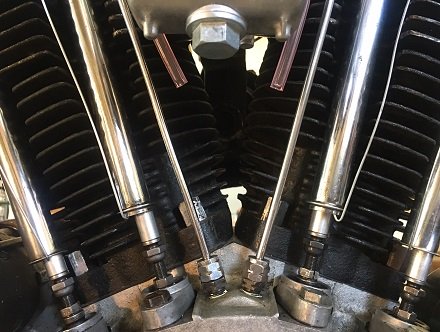
Lengths of heavy mechanic's wire bent to shape work just fine.
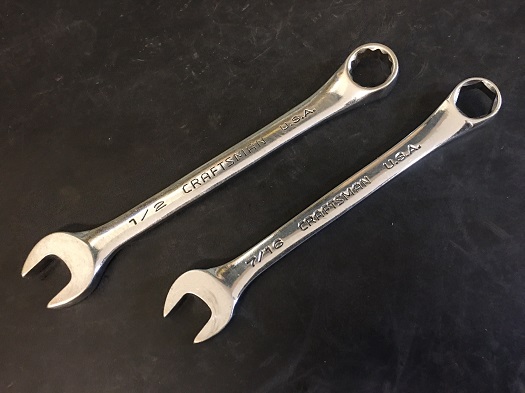
You'll also need 7/16" and 1/2" open-end wrenches.
**********************
Push Rod Tube Seals
Before starting the tappet adjustment procedure, check the tube seals. If they look old and brittle, now's the time to replace them.
For 1957-1979 tube seals click here
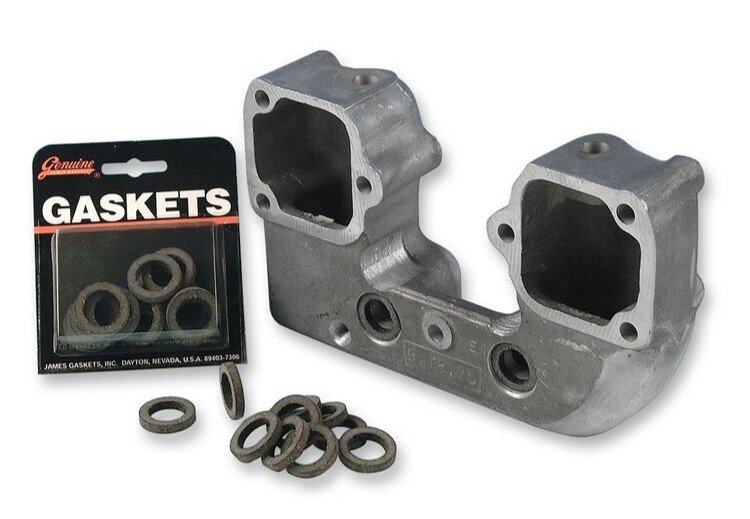
For 1979-1985 tube seals click here
**********************
Valve Adjustment Procedure
The following is essentially the method laid out in the factory service manual, plus a few tips we've come across over the years. Remove the spark plugs so the motor turns over easily. Removing the air filter may give you some extra work room.
Turn the engine slowly and watch how the lifters move. After you do this several times, you can anticipate when the cams/lifters will go up and down.
Intake valves are those nearest to the carburetor, exhaust valves are furthest. When a tappet is fully open, the corresponding tappet on the other cylinder will be fully closed. For each tappet you adjust, you want it fully closed (at it's lowest position).
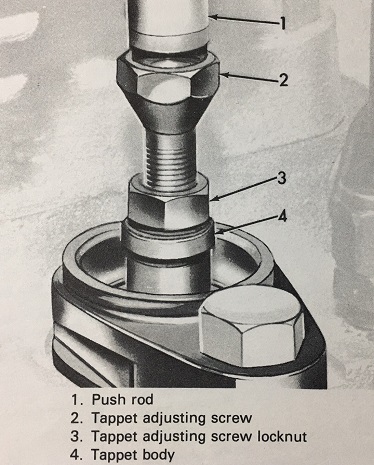
Feel for 'up and down' play in the push rod with your thumb and index finger. The push rod should turn right to left (back and forth) smoothly with no binding.
Adjust Intake Valves
When the front intake valve is fully open, the rear intake can be checked/adjusted. When the rear intake valve is fully open, the front intake can be checked/adjusted.
Adjust Exhaust Valves
When the front exhaust valve is fully open, the rear exhaust can be checked/adjusted. Then, when the rear exhaust valve is fully open, the front exhaust can be checked/adjusted.
Tappet Adjuster Screw and Nut
If there is too much play, loosen the bottom tappet adjusting screw lock nut, then turn the adjusting screw towards the push rod until it's gone.
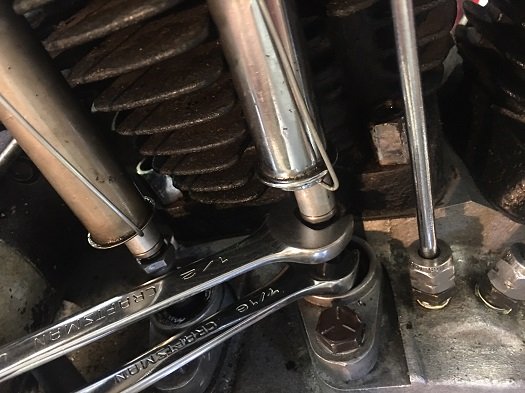
When correctly adjusted, the push rods rotate freely with any binding. There will be no up-down or side-to-side movement.
NOTE: If an exhaust valve is adjusted too tight, it could burn a valve. For this reason, some tuners leave the exhaust slightly loose.
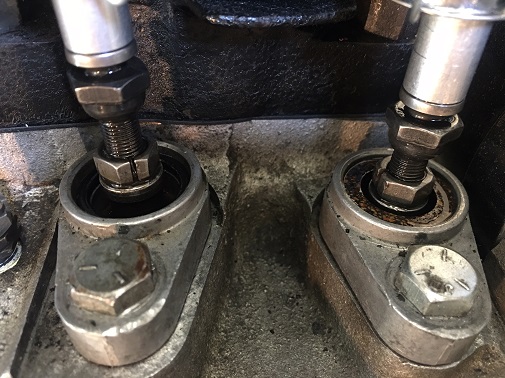
When satisfied with the results, tighten the locknut while holding the adjusting screw and recheck the clearance.
Then check it once again as it sometimes changes.
The factory torque spec is 8-10 ft/lbs against the tappet body, but most techs just use their own good judgment.
NOTE: The lock nuts purposely have a cut in them. They are commonly called 'split nuts', and they help prevent the nuts from loosening.
**********************
Problems With The Lock Nut and Threaded Screw
Sometimes you'll find a lock nut that isn't turning freely, or binds in one spot. Sometimes a lock nut gets wrenched up too tight against the flared, unthreaded portion of the adjuster screw, and won't come loose.
If for any reason all the lock nuts don't thread up and down easily on all the adjuster screws, the best thing to do is replace them.
If you need to replace only the split lock nuts you can buy them here.
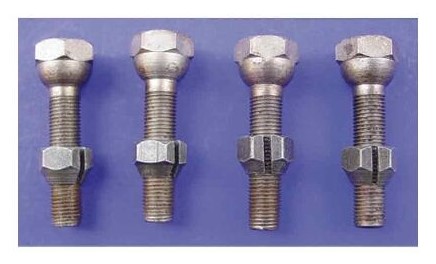
To buy an Ironhead Tappet Screw and Nut Set click here.
**********************
Re-Install Push Rod Covers
When reinstalling the pushrod covers, make sure that the upper tubes are seated into the bottom of the cylinder head.
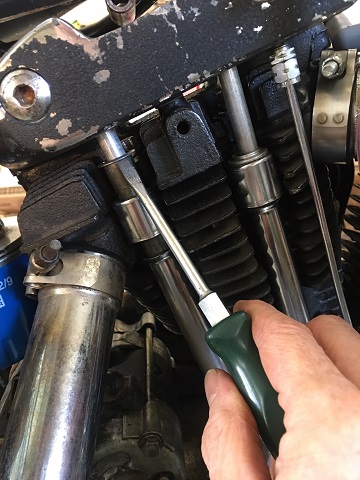
If they aren't, you'll never get the pushrod covers back on!
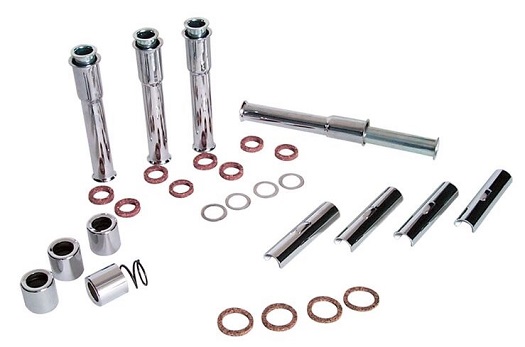
If you're missing pieces, you can buy a pushrod cover kit here.
**********************
How Often Should Ironhead Valves Be Adjusted?
The factory service manual states that adjustment should be done after 500 miles of initial engine break-in, then at 1,000 miles, and every 2,000 miles thereafter.
**********************
Related Articles:
Ironhead Sportster Maintenance
Rocker Box Assembly
Ironhead Specialty Tools
Sportster History 1957-1966
Sportster History 1967-1979
Sportster History 1980-1985
